Antec Twelve Hundred V3 3.0

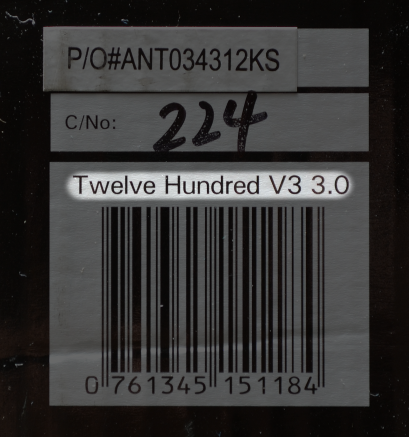
While building a Cleverbox 20 for a customer, I was surprised to find that Antec has made some slight changes to their Antec Twelve Hundred V3 chassis design. Note that neither the Antec website nor Newegg, the vendor who sold me the item, make any mention of these changes in the tech specs, photos, or in the product description. However, according to the box, the case is now known as the Antec Twelve Hundred V3 3.0:

A subtle change in name
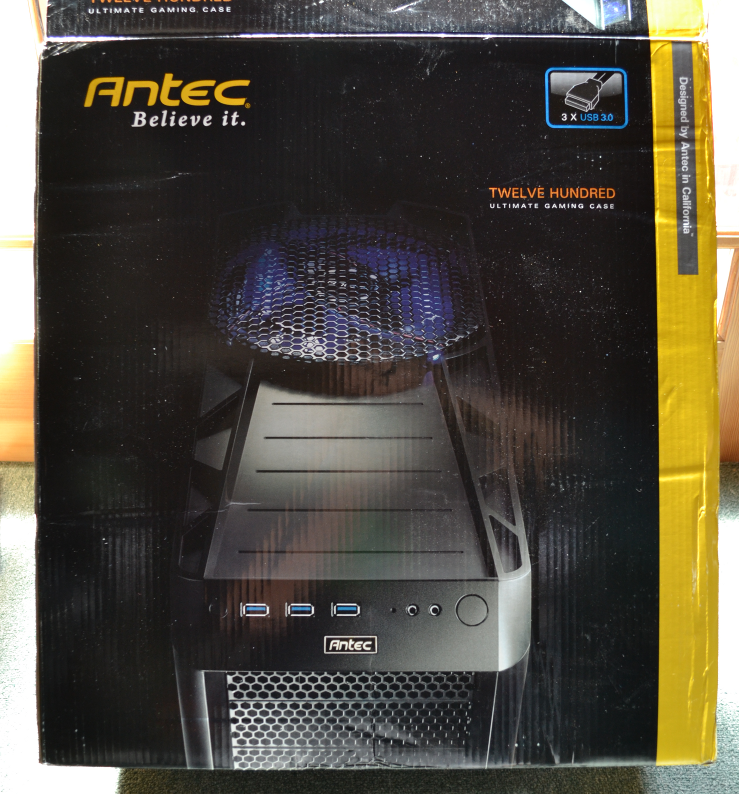
At least the photo on the box is correct…

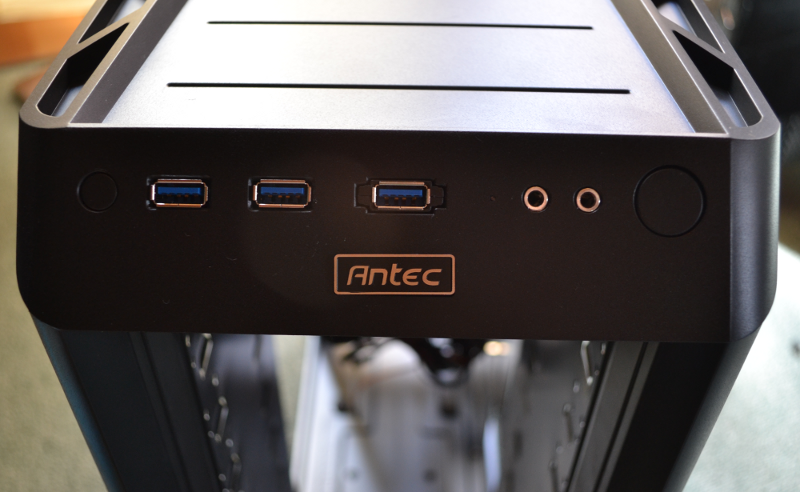
The primary change is the addition of two new front panel USB 3.0 ports, for a total of three. Secondly, they now connect directly to the motherboard with the new standard 20 pin USB 3.0 header cables:

This is a big improvement over the Antec Twelve Hundred V3, which required you to plug a long USB 3.0 cable into a rear panel port on your motherboard, which was far from elegant. My only gripe with this change is that Antec did not provide any USB 3.0 to USB 2.0 header adapters with the case. This means that if your motherboard doesn’t have any USB 3.0 headers, then you’ll need to provide your own adapters such as these from Lian Li and Corsair. A recent Lian Li case that I wrote about in a previous blog entry did come with one of these adapters. I think it would be a good practice on the part of all chassis manufacturers to follow suit. (Edit: actually, Antec may be on top of this, see below.)

The other major change is the new style of thumb screws provided:

These new thumb screws are a welcome improvement. I find them more aesthetically pleasing as they match the matte black finish on the rest of the case interior, and they are just as easy to work with. Happily, the new thumb screws can be used to secure four Norco SS-500 drive cages!

Well, sort of. They mostly fit, but you’ll find that a few of them are a bit loose or won’t tighten completely. I’m not sure if the screws or the screw holes on the drive cages are to blame. Either way, as long as you aren’t moving your server around too much then these screws should be fine to use. Antec doesn’t provide you with enough of the thumb screws to secure each cage with four on each side, but you can use just two per cage on the backside or three per cage on each side and be just fine. However, if you plan to ship your server as I will be doing with this one, then I recommend using the (expensive!) Norco screws for a tighter fit. And yes, you do still have to flatten the tabs separating the 5.25″ bays.

Protip: when installing Norco SS-500 drive cages into this case, make sure that the drive trays face down as in the photo above. This is the only way the screw holes will line up correctly. Also, adjust the depth of each cage such that the vertical pattern of two screw holes lines up, not the pattern of three.

I haven’t noticed anything else about the case that has changed. The Antec Twelve Hundred V3 3.0 is still the most economical and flexible solution for a 20 Drive tower case readily available in the US.

Edit: Just after publishing this blog post I received this email from Antec!

Trouble Ticket ID: 251059
Description: Missing USB 3.0 to USB 2.0 header adapters
Comment By: James Sean
——————————————————-
Comment: Hello Stephen,

Thank you for contacting Antec. We do have the USB3 to USB2 adapters for your case. I will contact our Parts Division on getting you these adapters out to you. You should be receiving them 7-10 business days from now.

James
Antec Support

First impressions of a new portable case from Lian Li

Hooray, a new toy! I’ve had my eye on the Lian Li PC-TU200 for some time now, and have been waiting for it to come down in price. It finally has, at least temporarily. Newegg currently has it on sale for $136 shipped (ends 5/23/2012), see here for details. Hopefully the non-sale price of this unit drops as well.

This isn’t meant to be a complete review, just my initial impressions of the chassis. Behold, some glorious cell phone photos:

Front – the handle is folded down and not visible
Back – again the handle is folded down. The white box containing the chassis accessories is zip-tied in place for shipping.
One of the most unique side panel removal systems I’ve seen – first release a single thumbscrew (top)…
…then press the lever and the side panel pops open!
Each side panel is held in place by 8 of these small metal things (well, what would you call them?)
A glimpse of the interior
The drive cage and backplanes. Looks like there’s plenty of airflow vents.

The rear of the backplane – 4 SATA ports and 2 Molex. 120mm intake fan to the left, secured by a single thumbscrew.

Hard drives are secured with plastic rails attached with four large thumbscrews. Not trayless, but at least tool-less!
The hard drive installed in the cage. The single thumbscrew on the left secures the sliding metal rail that holds all four drives in place.
The drive cage also features two mount point for 2.5″ drives in the middle and at the bottom. I’m not sure at this point if the drive will line up with the backplane SATA and power ports, or if it prevents a 3.5″ drive from being installed immediately above it (this photo indicates both limitations are likely true).
Another view of the 120mm intake fan.
The 120mm intake fan. A 3-pin model with a 2-pin Molex adapter and removable dust filter. Fan removal is fairly easy. It is held in place primarily by friction from the rubber anti-vibration mounts, and is locked with a single thumbscrew. Depending on the noise levels, I may replace this fan with a 4-pin PWM model.
The bottom of the chassis. On the left, a second removable dust filter, this one accessible from the exterior. On the right, a third 2.5″ drive mount point. This mount point would only interfere with large or long PCIe video cards, which I won’t be using. The feet are made of metal.
The chassis ships with a handy USB 3.0 to USB 2.0 pin adapter, which I will be using since my motherboard doesn’t support USB 3.0. I’m glad those two front USB ports won’t go unused!
Finally, the chassis ships with a well-designed and easy to follow set of graphical instructions. Always a nice touch.
I was somewhat surprised to find that the exterior corner pieces and handle are made of plastic, while the majority of the rest of the construction is brushed aluminum and steel. The plastic is thick and feels durable, so I’m not worried.
My only real concern is that in unpacking the chassis I discovered two of the plastic clips that secure the side panels in place free-floating in the package, one of which was broken. Given Lian Li’s track record for customer service, I expect that a quick email and photo will be met with a replacement clip sent my way. However, I do wonder how these plastic clips will hold up over time. Since most of the construction is durable aluminum and steel, I wish these clips were made of metal as well.
I won’t have a chance to finish this build for another week or more. I’ll post more photos and comments as the build progresses.

- Stephen